The image block component allows you to incorporate an image into your page's layout. You'll also be able to choose between a variety of format settings to optimize its display to meet your needs.
Steps to incorporate an image component
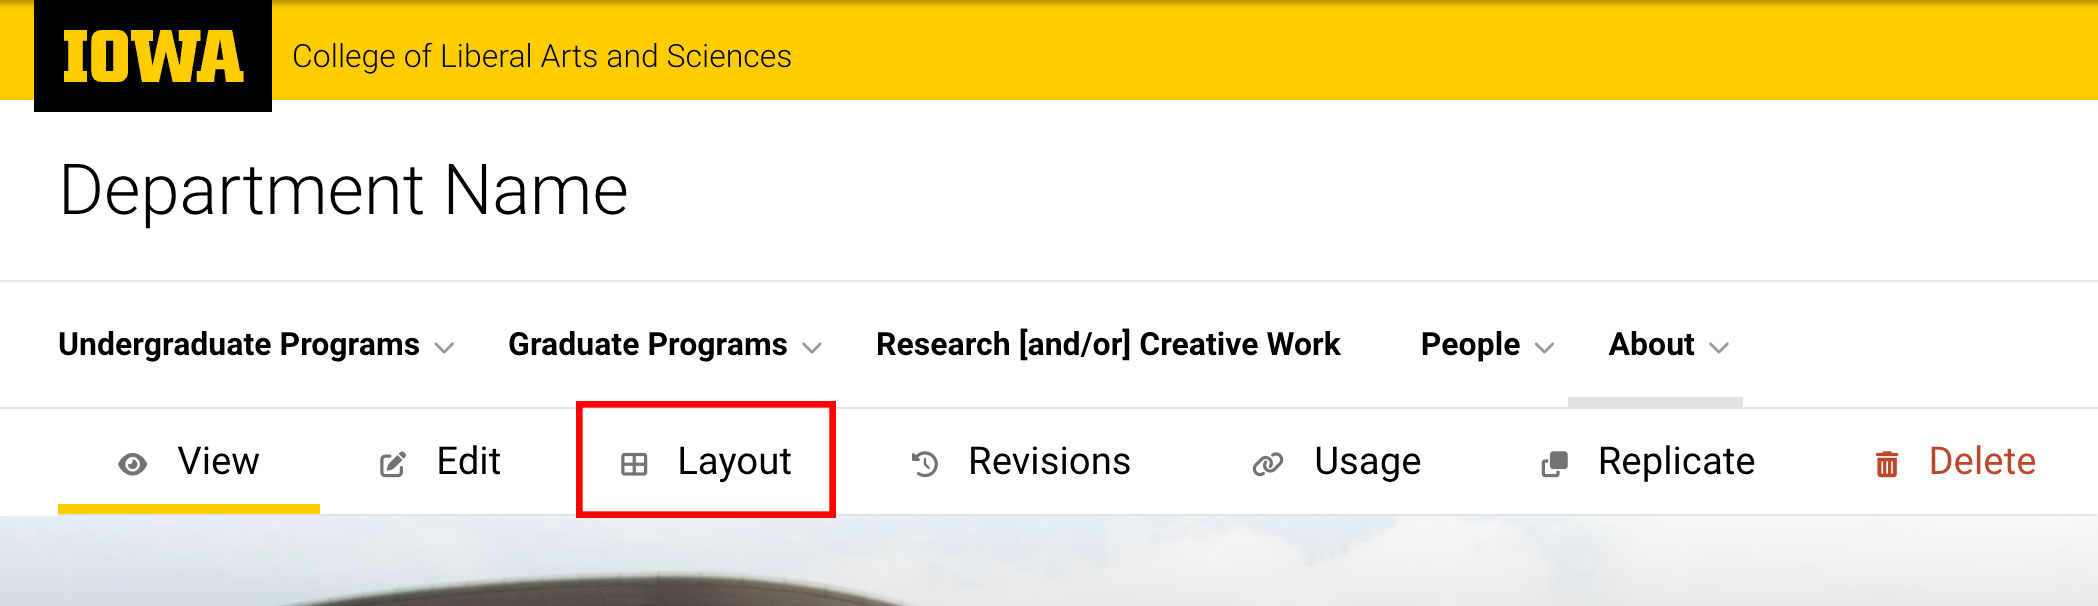
Find the page you want to update and open the Layout tab.
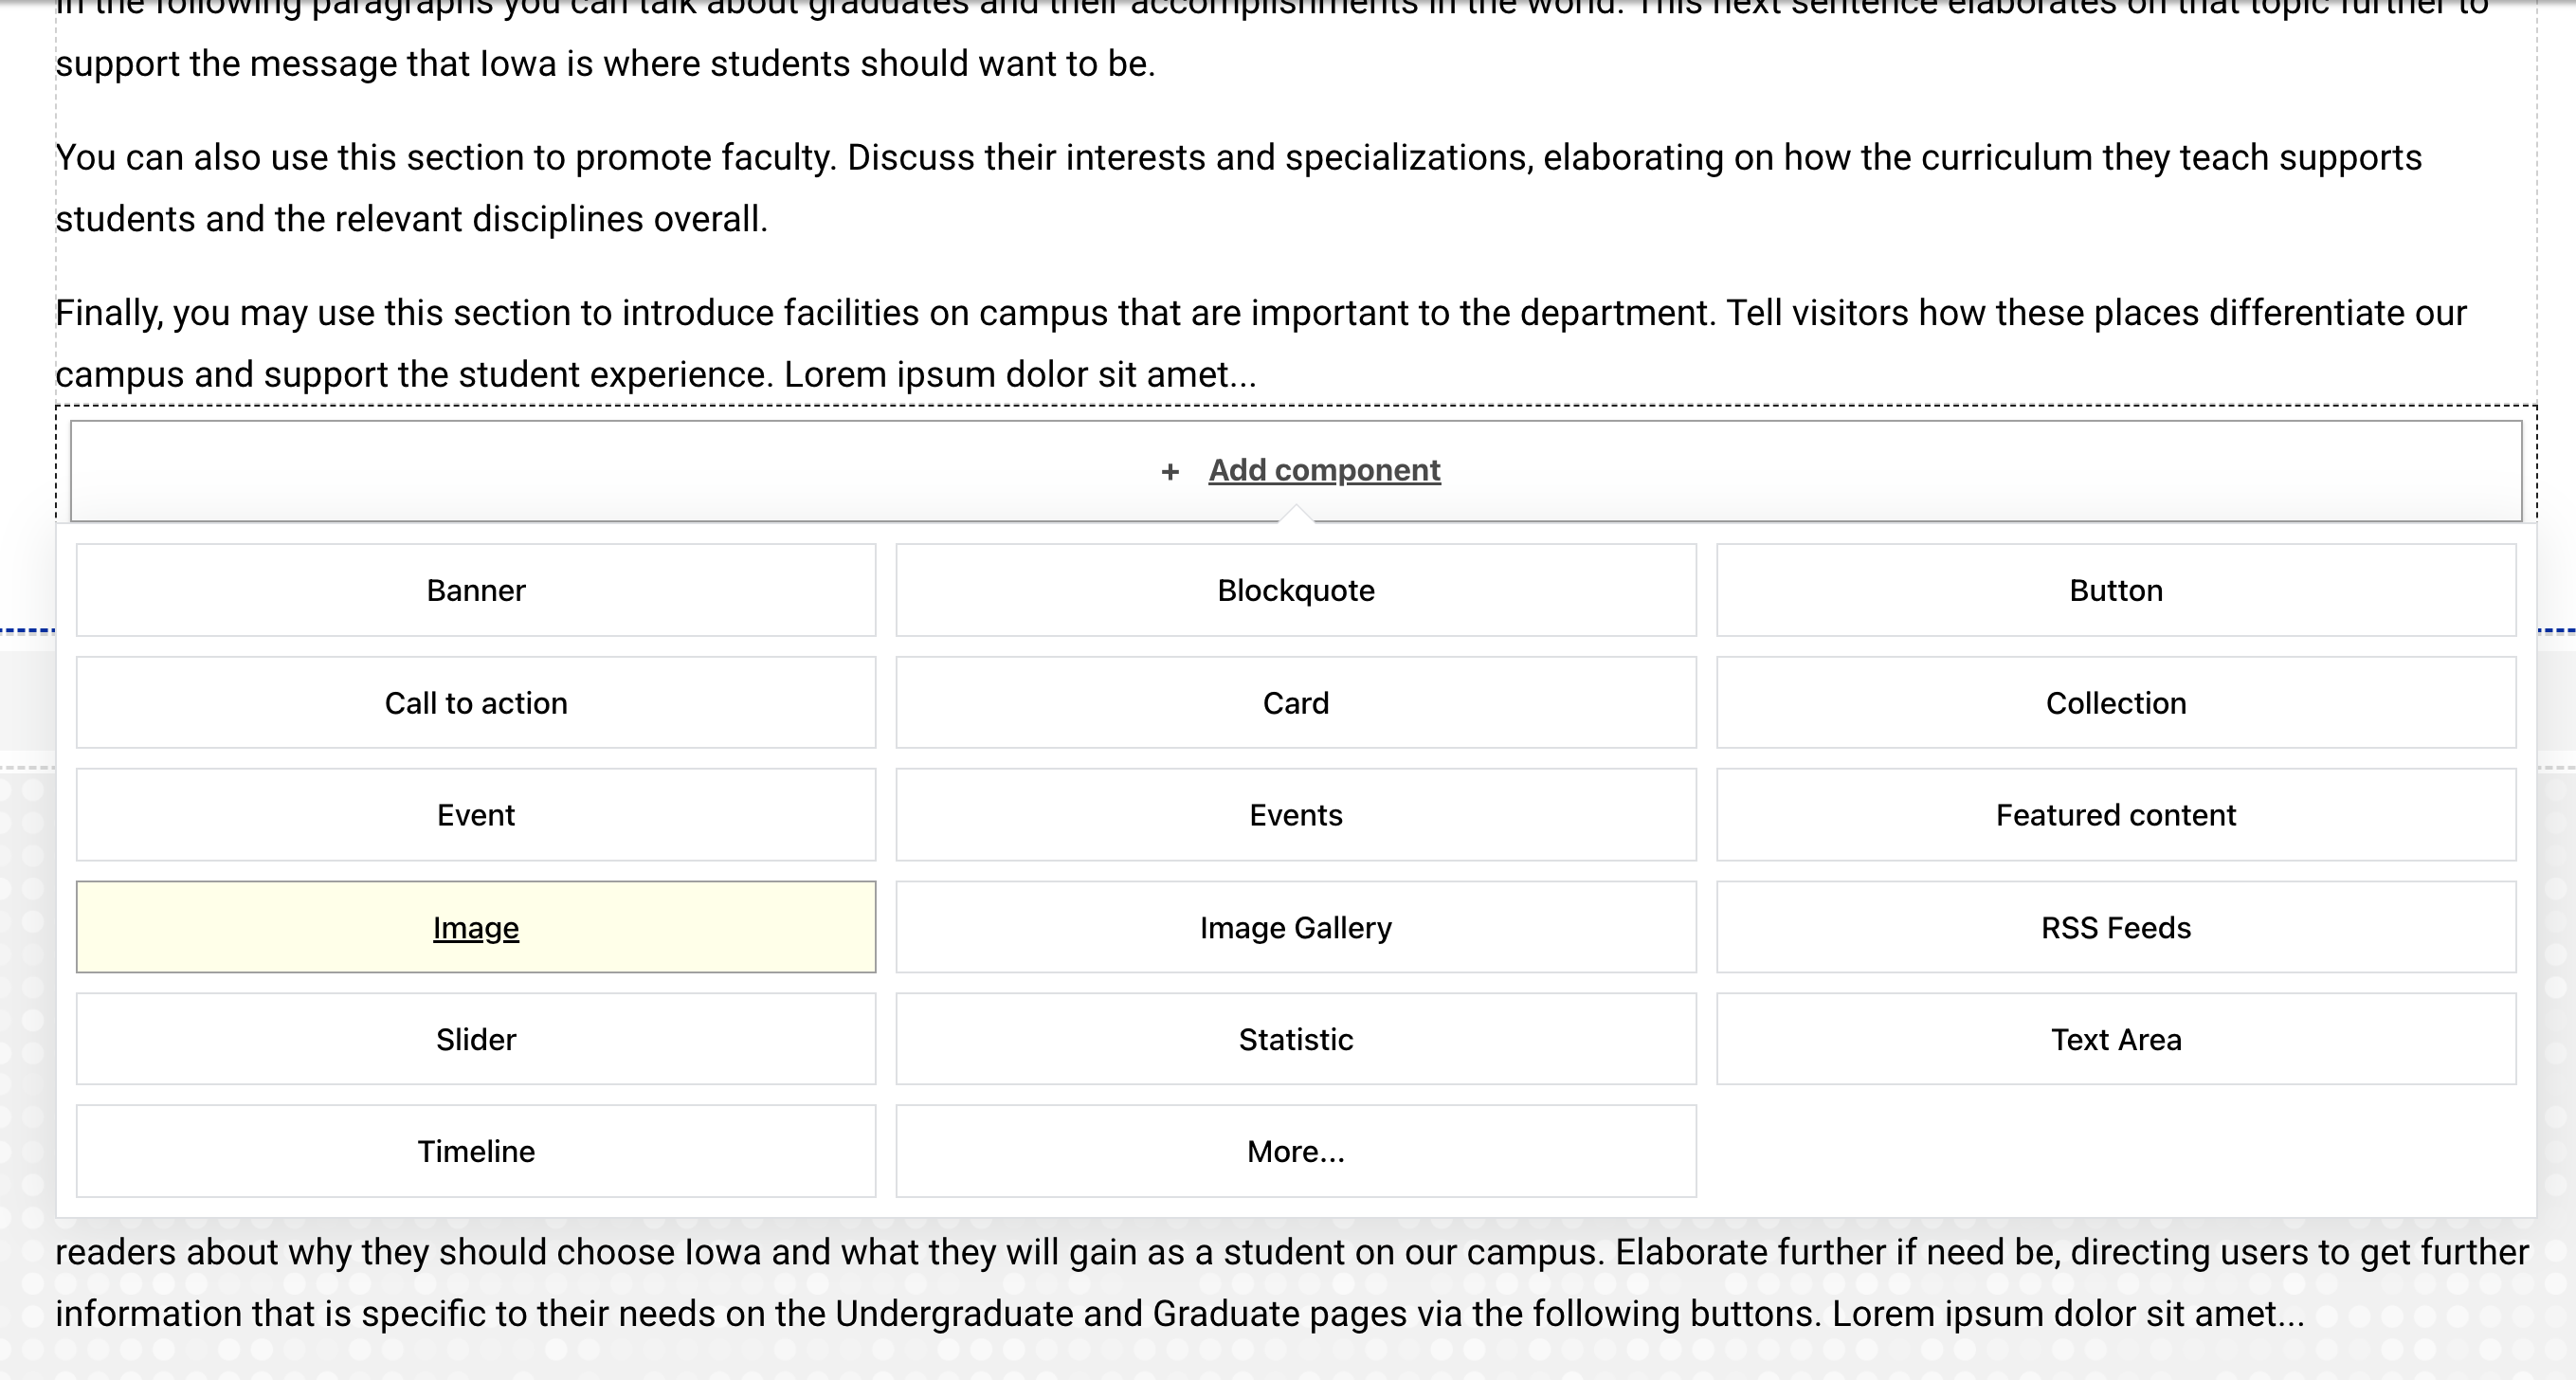
- Select "Add component" in the section and column that you want to add the image to.
- Select the Image component from the dropdown list.
Note that there is also an Image Gallery component, which is different and should be used when adding a set of multiple images to the page.
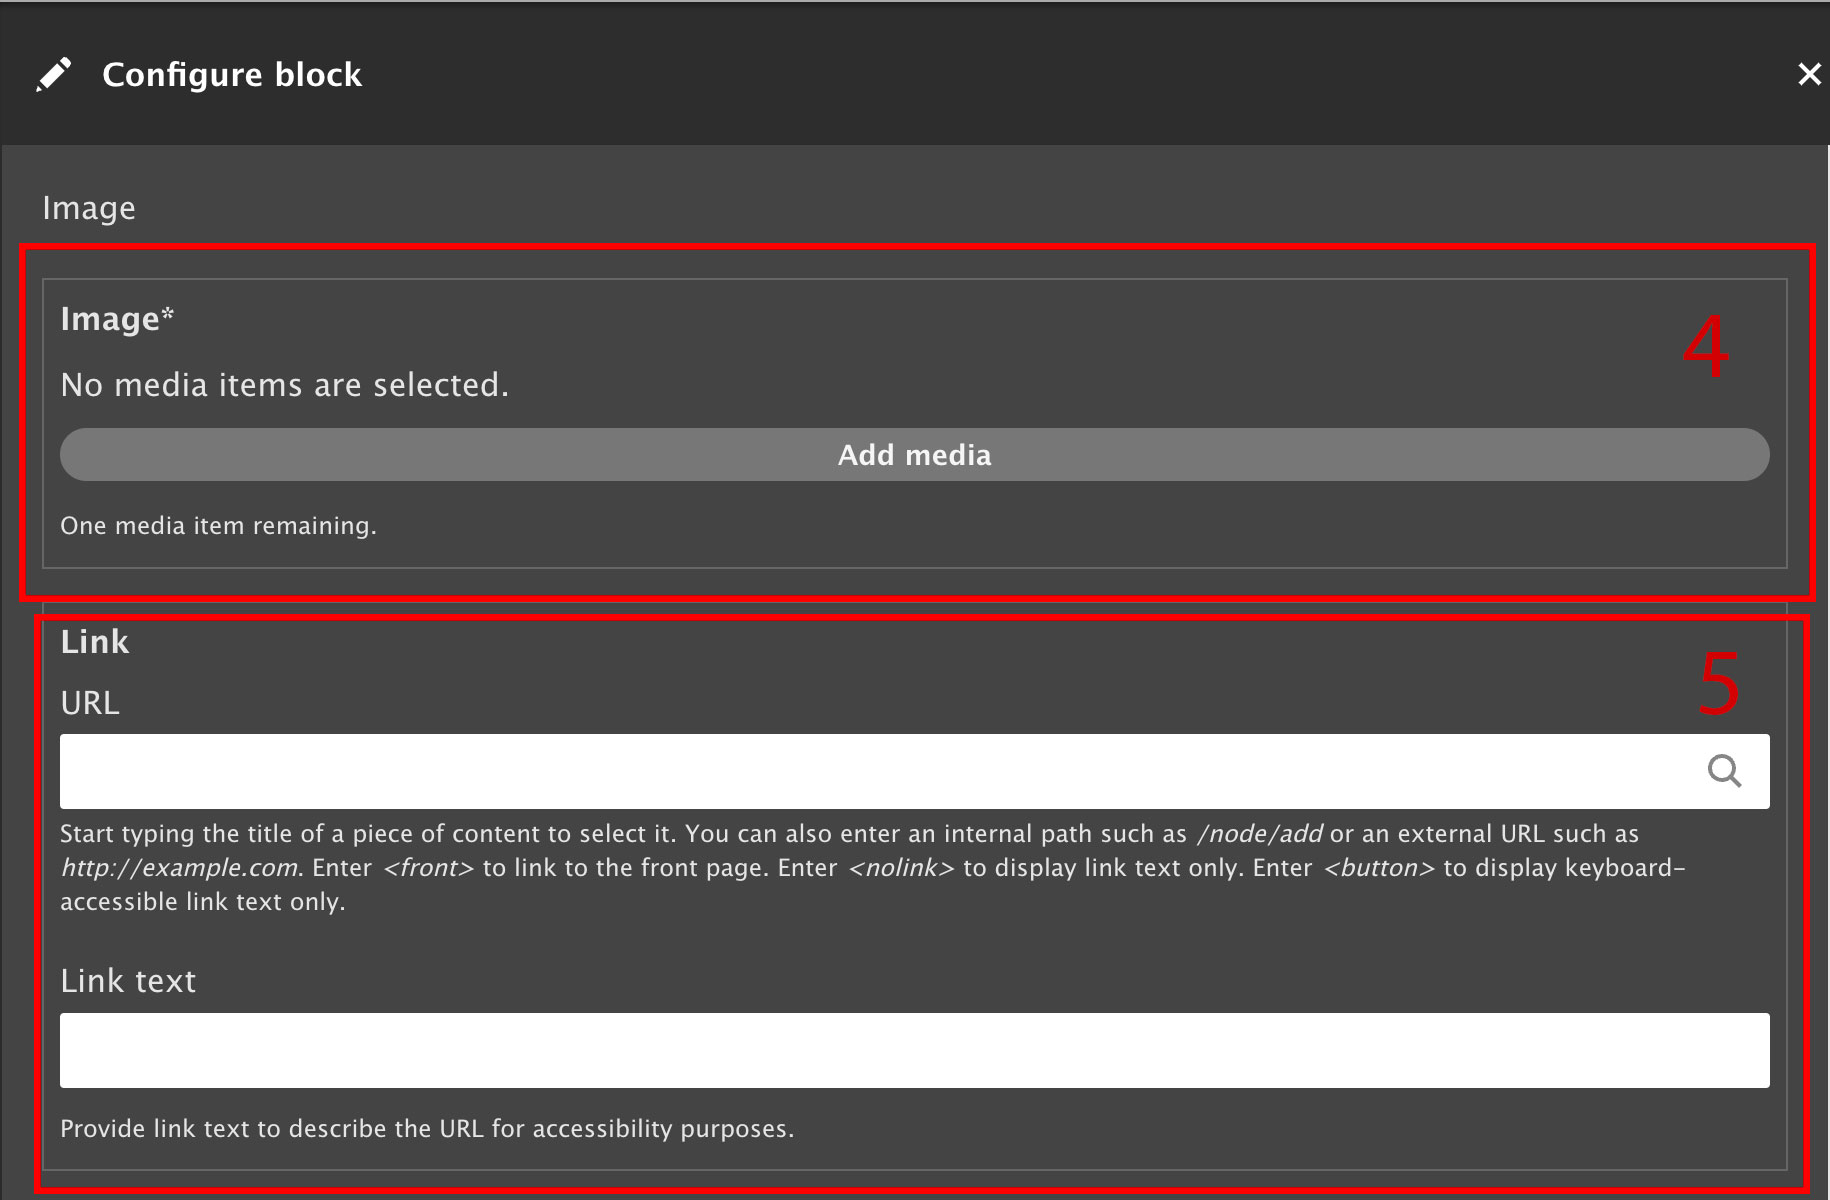
- Select "Add media" to upload or search from the media library to find the correct image.
Optional: If you want the image to be linked, use the Link field to add the URL for the web page you want the image to link to.
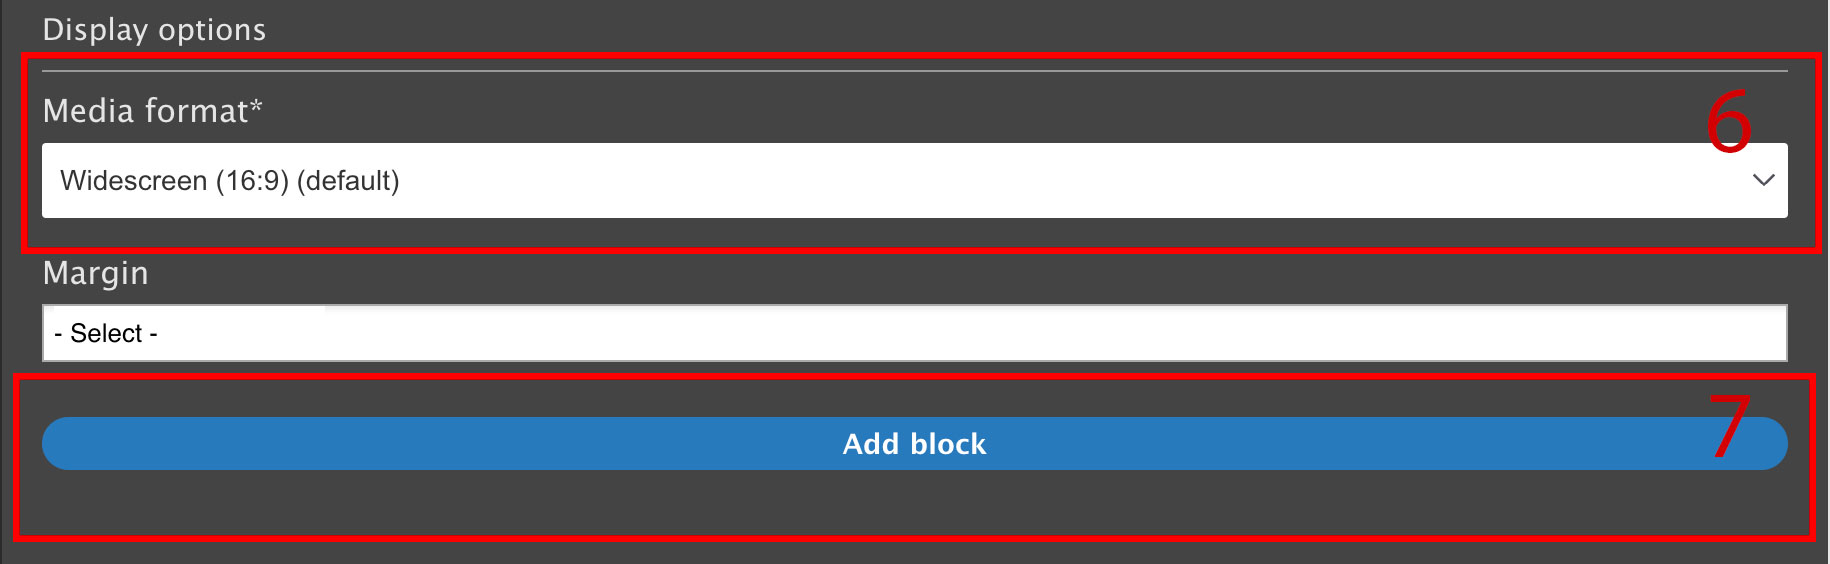
- To format the image, select the Media format from the available options. For an overview of the image options, you can reference this documentation.
Select blue "Add block" button.
- Scroll to the top of Layout screen and select the blue Save Layout button.
Additional support
Resources for additional learning
- Image block from the OSC web team
- Images and files from the OSC web team
- Why image optimization matters for Iowa websites from the OSC web team
- Adding media files to your site (video) from the OSC web team
- Adding dynamic web images (video) from the OSC web team