In order to display or link to images and documents, you will need to upload them into the website's media library. When you're ready to start incorporating these files, get started using these steps.
Steps to upload an image to the media library
On the Content administration screen, select the Media tab.
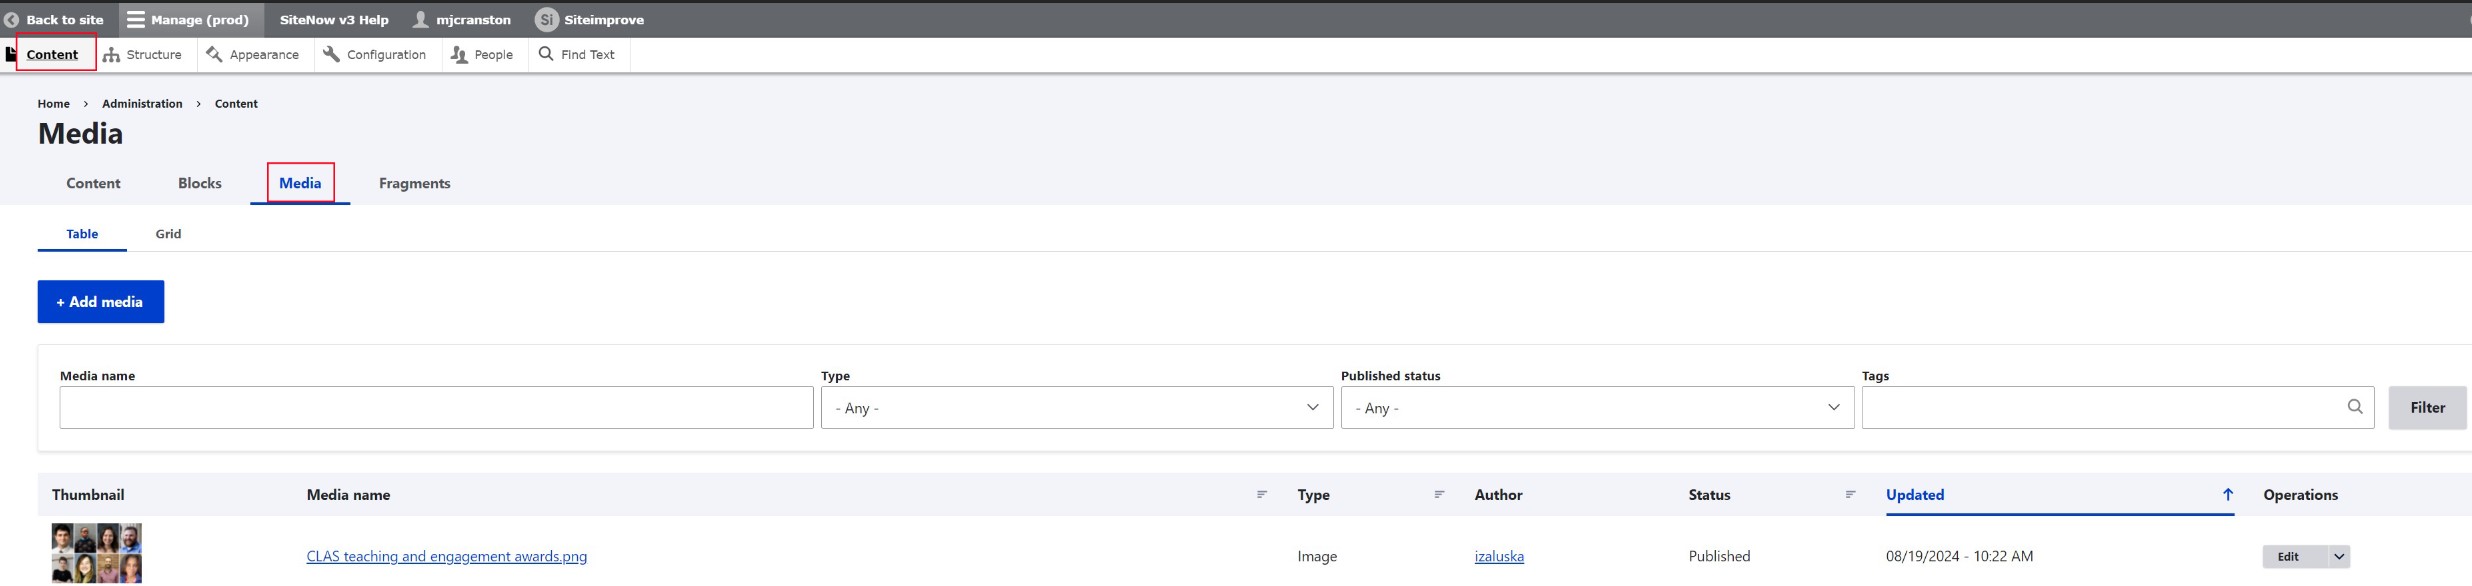
- Select the blue "Add media" button.
- Select Image from the "Add media item" list.
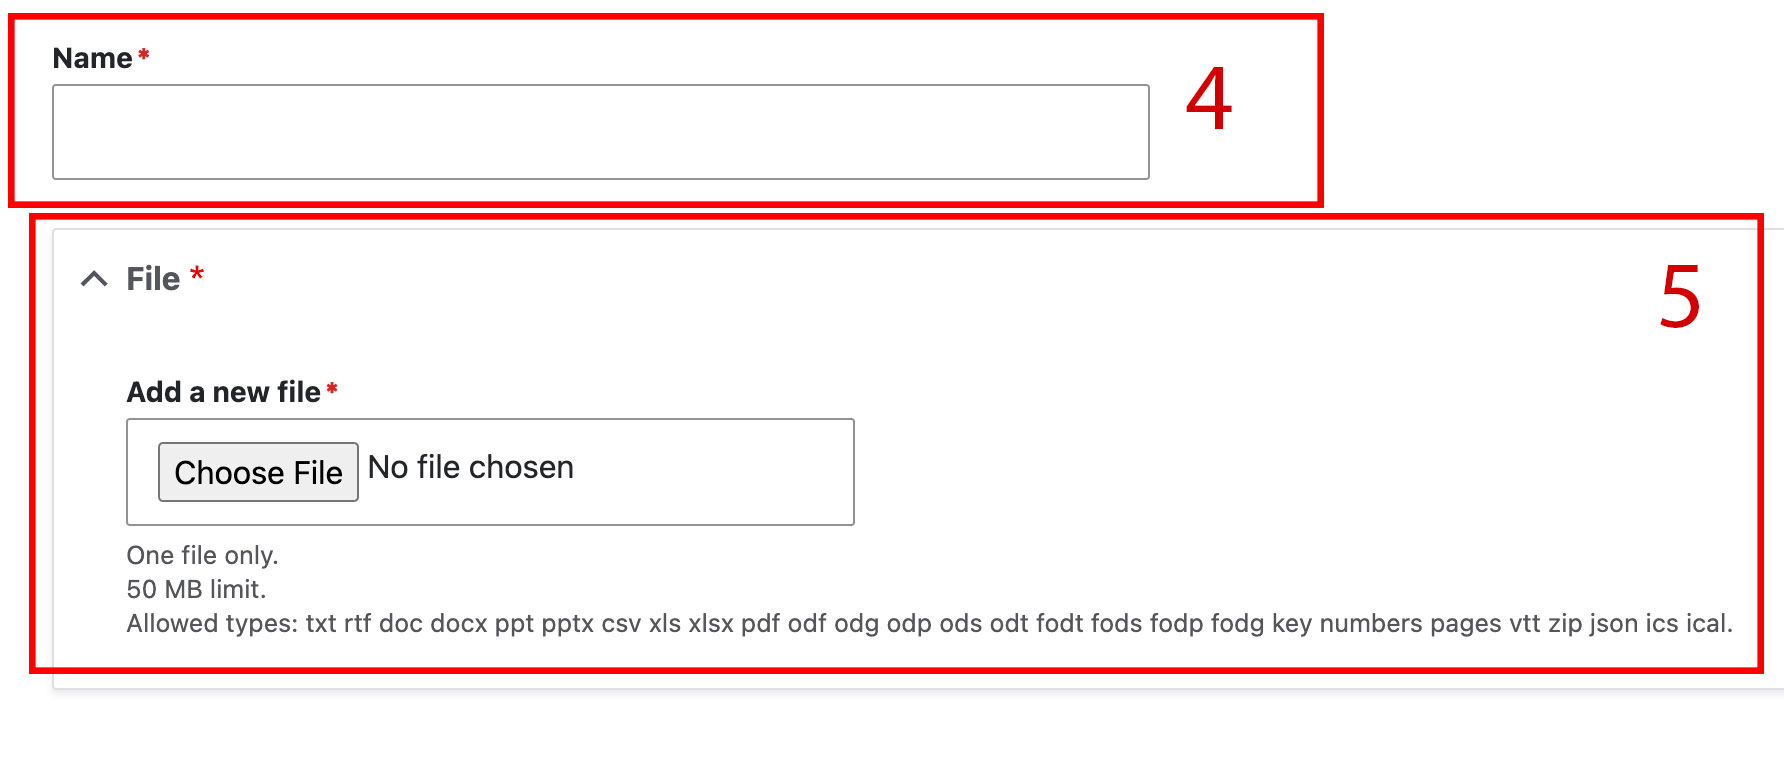
- Add an appropriate name for the photo file.
Select the Choose File button to upload the image file from your computer.

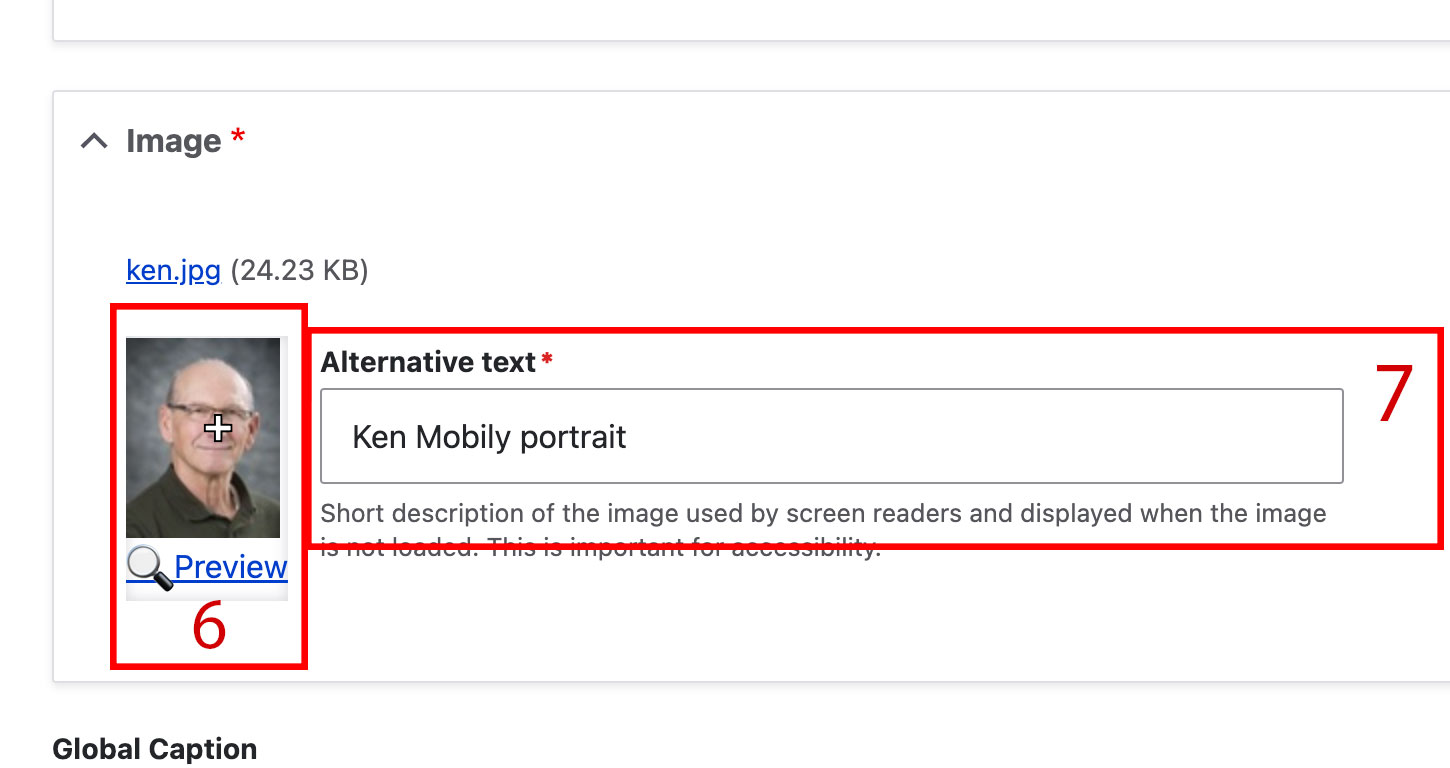
- Once the file is uploaded, select an appropriate focal point for the image.
Write alternative text that describes the image.
- Optional: Enter a Global Caption in the field of the same name. This will display with the image in certain areas of the site (ex. image gallery components).
- Select the blue Save button.
After these steps are complete, the image will be available to search for and use from the media library throughout the website.
Steps to upload a file to the media library
On the Content administration screen, select the Media tab.
- Select the blue "Add media" button.
- Select File from the "Add media item" list.
- Add an appropriate name for the document file.
Select the Choose File button to upload the document file from your computer.
- Select the blue Save button.
After these steps are complete, the file will be available to search for and use from the media library throughout the website.
Additional support
Resources for additional learning
- Images and files from the OSC web team
- Image block from the OSC web team
- Image gallery block from the OSC web team
- Adding media files to your site (video) from the OSC web team
- Adding dynamic web images (video) from the OSC web team
- Why image optimization matters for Iowa websites from the OSC web team