The image gallery block component allows you to incorporate a set of images into your page's layout. You'll also be able to choose between a variety of format settings to optimize its display to meet your needs.

Steps to incorporate an image gallery component

  1. Find the page you want to update and open the Layout tab.

    Screenshot of the Layout tab in the site admin
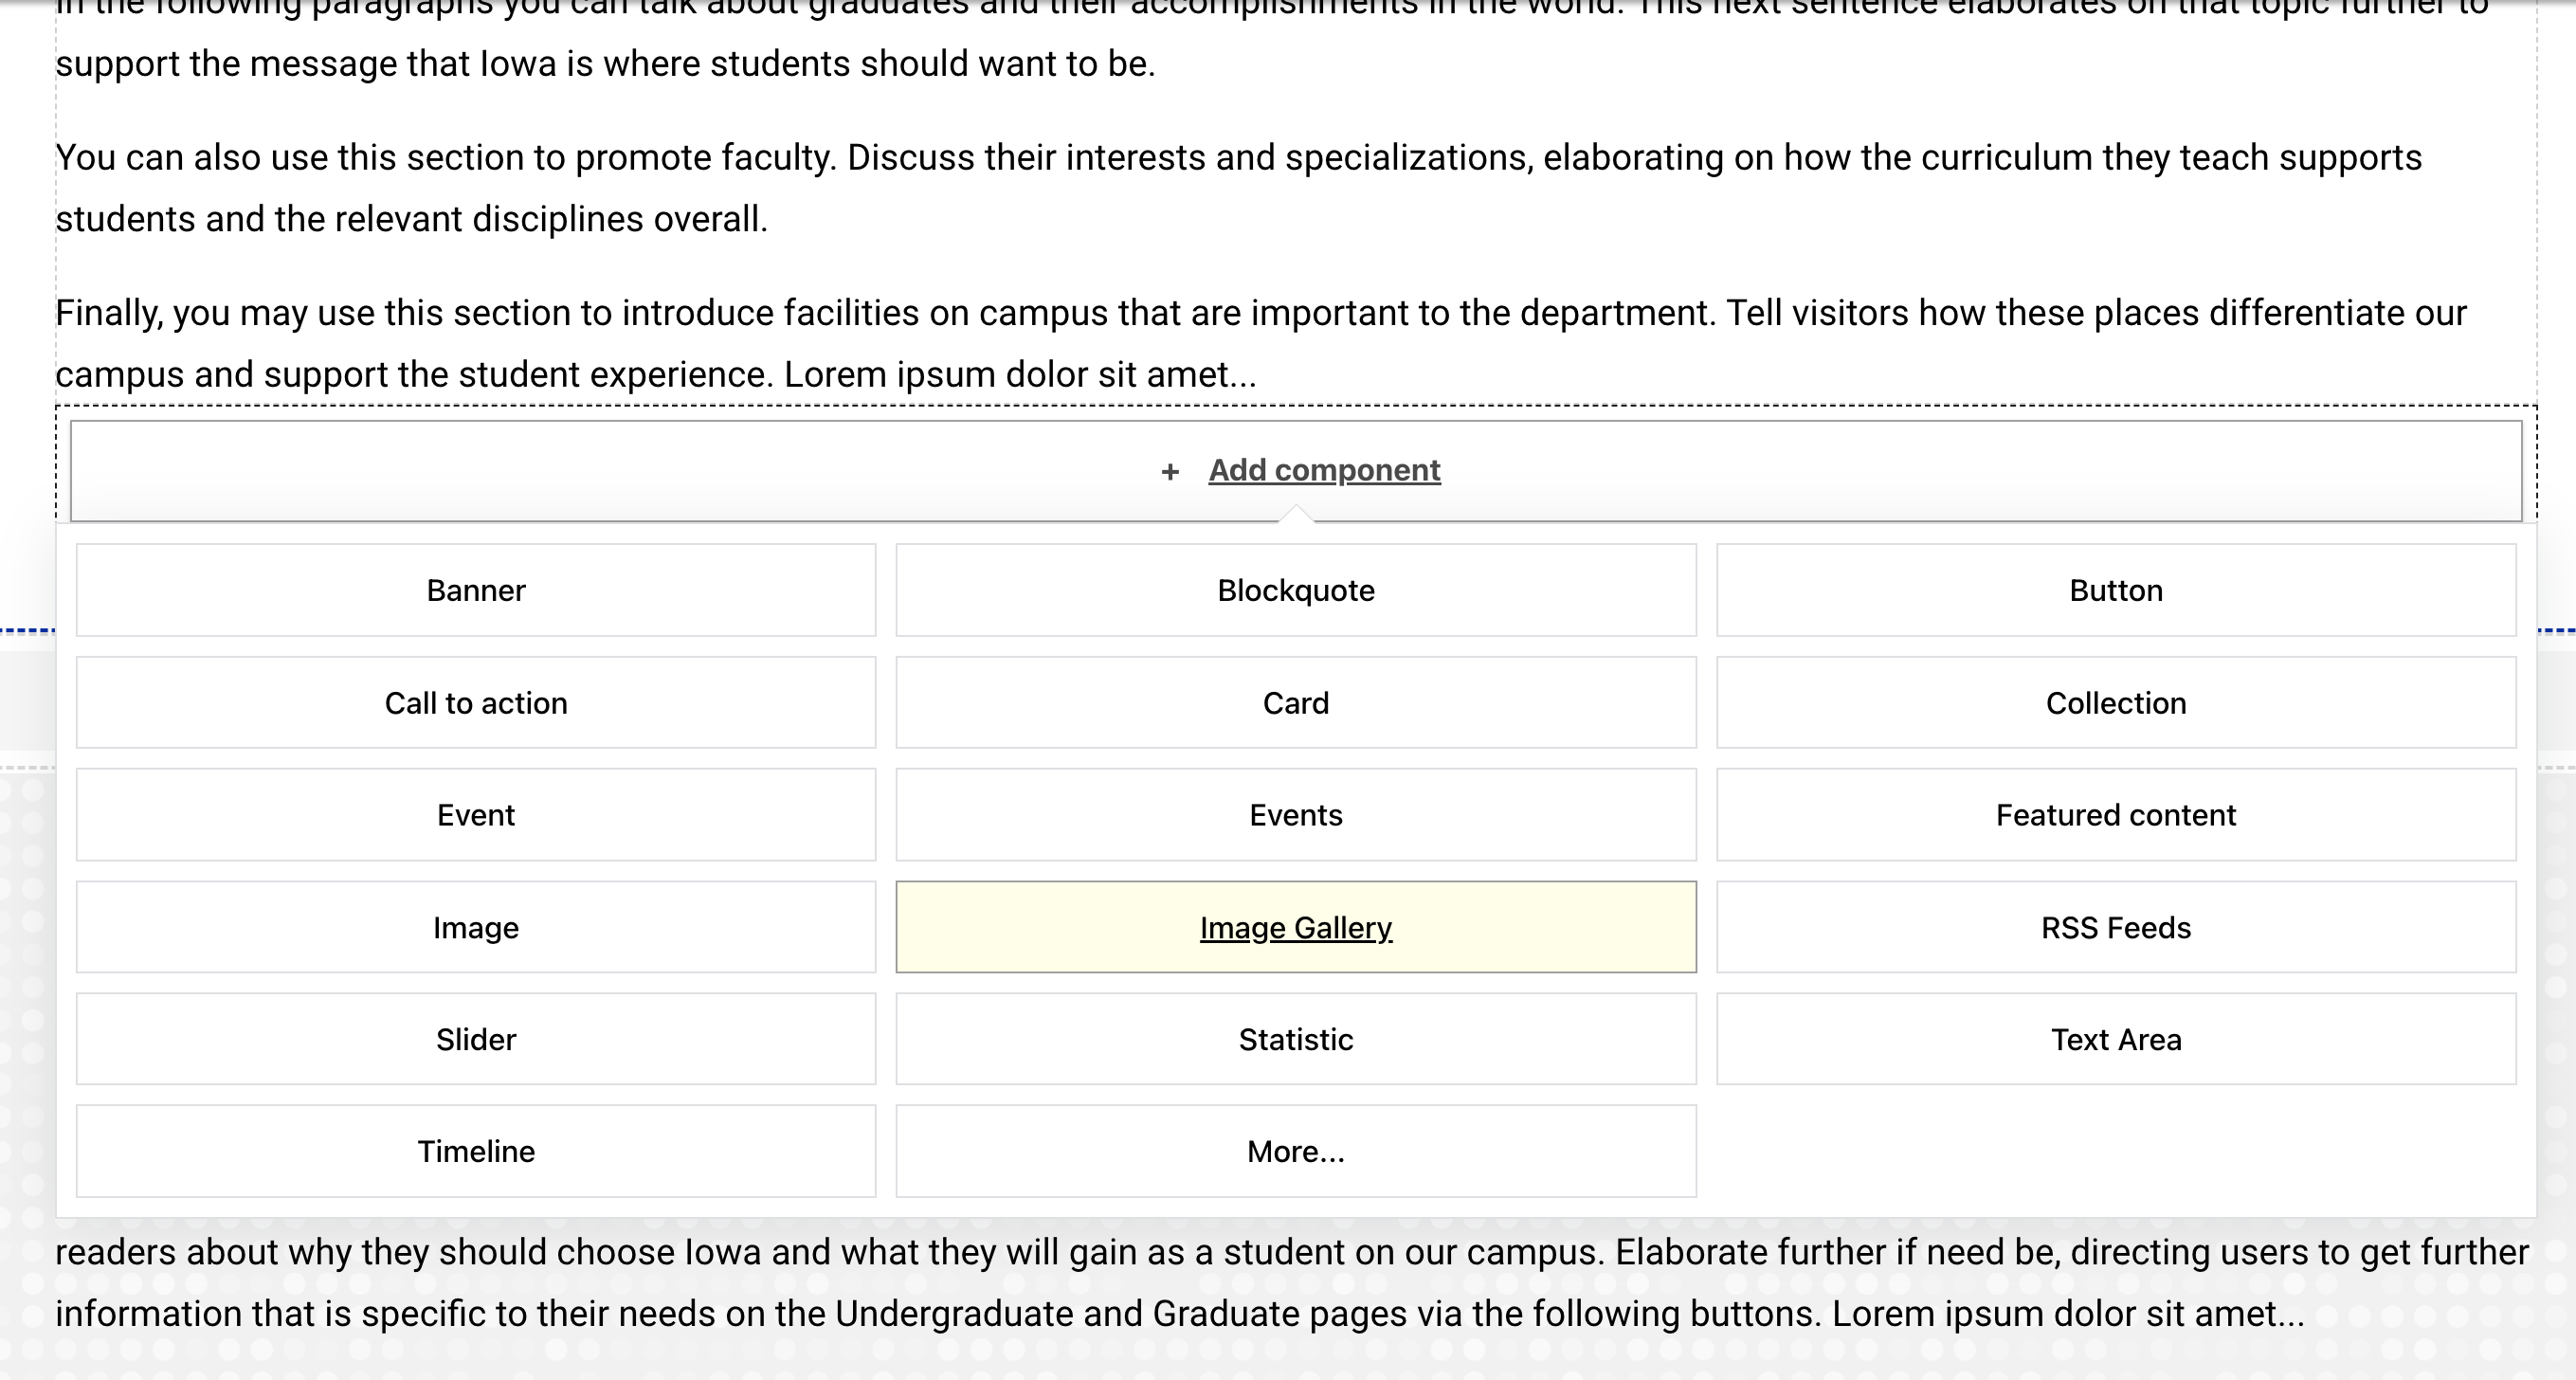
  2. Select "Add component" in the section and column that you want to add the image to.
  3. Select the Image Gallery component from the dropdown list.
    • Note that there is also an Image component, which is different and should be used when adding a standalone image to the page.

      Screenshot of adding an image gallery component in Layout
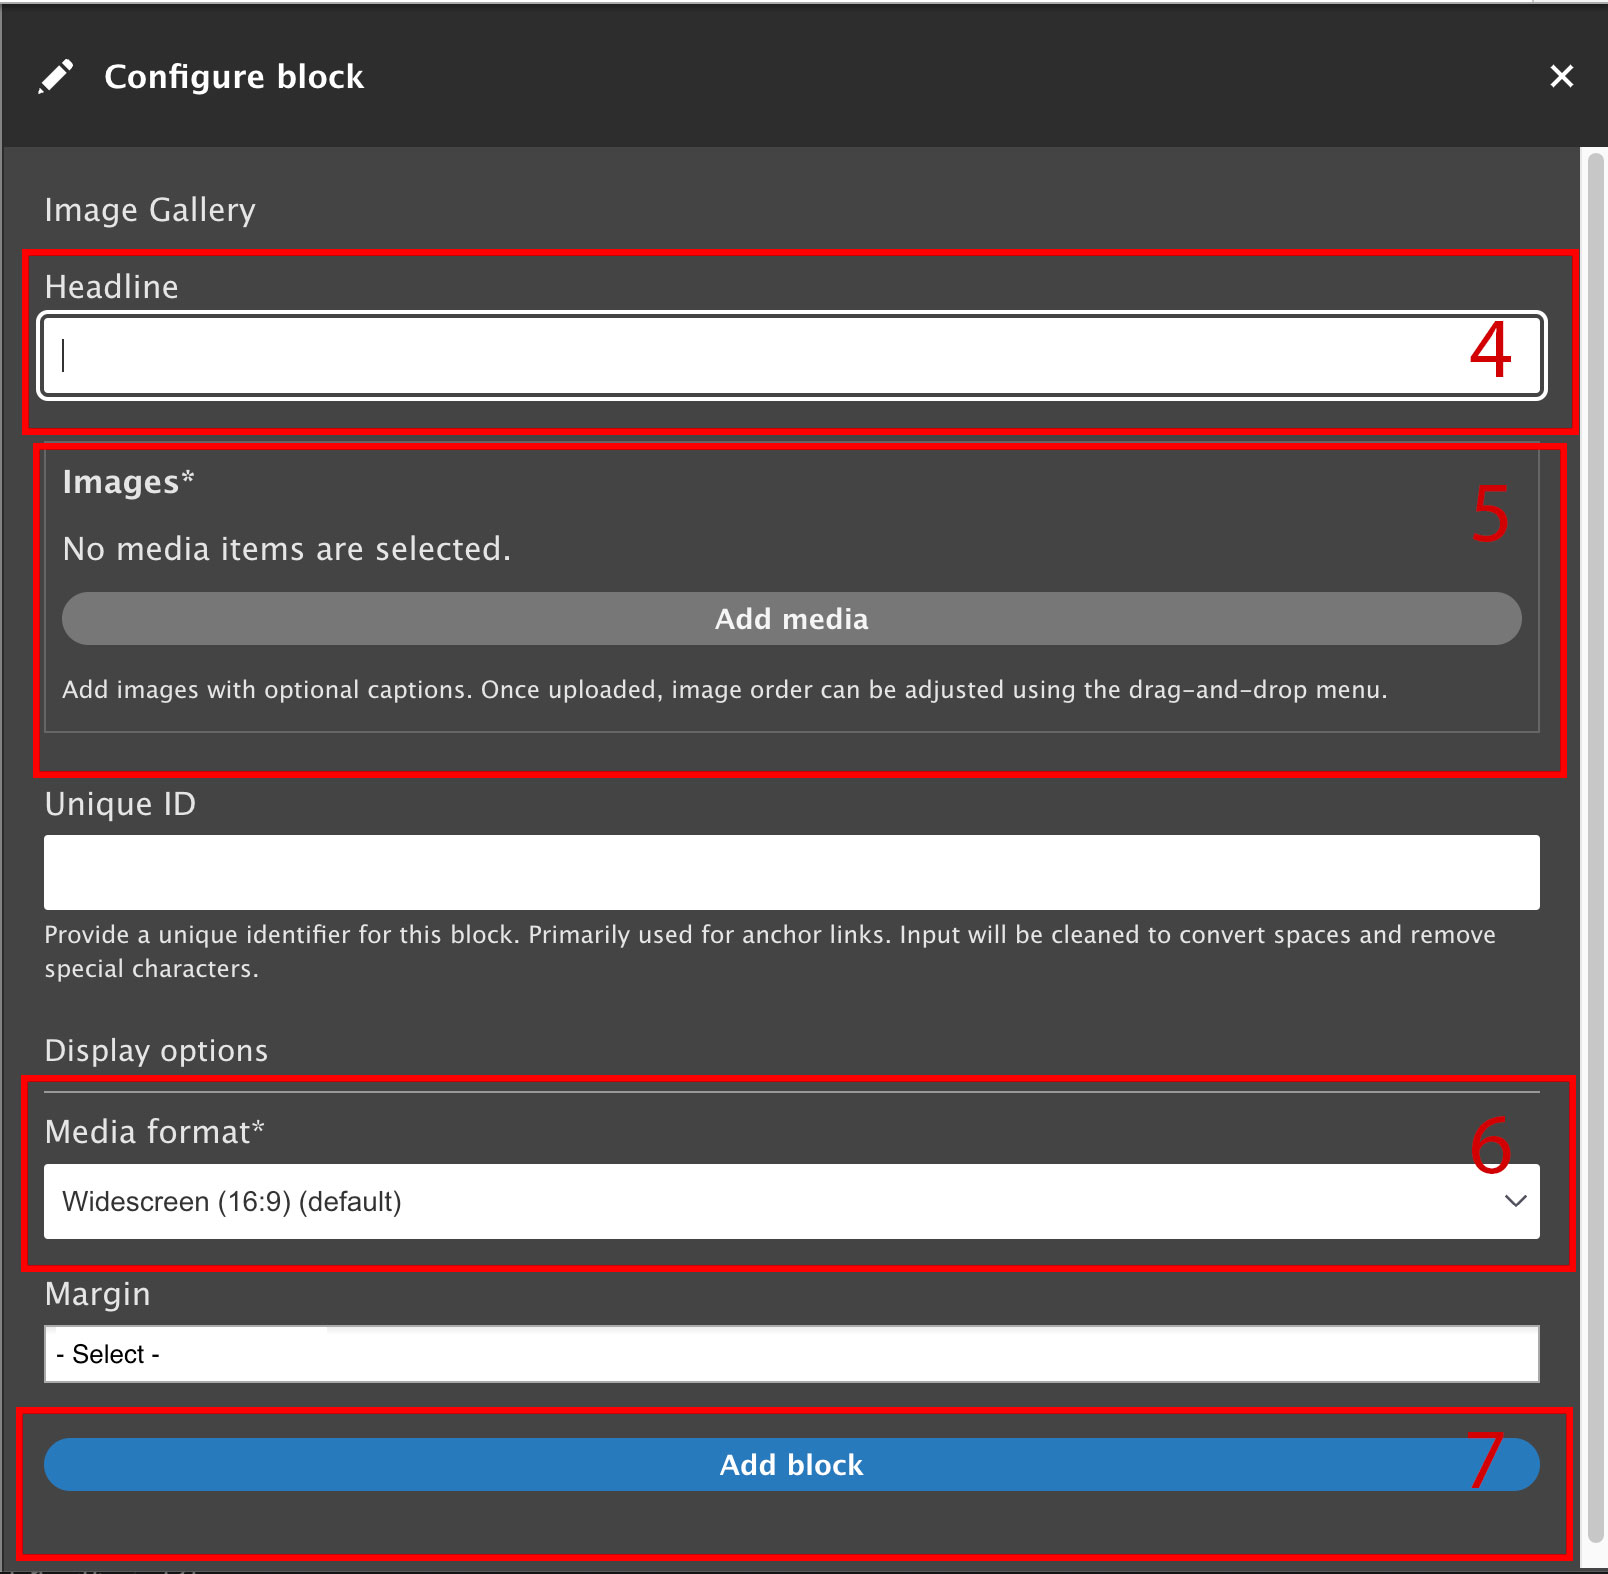
  4. Optional: If desired, add a descriptive headline to the gallery. If used, it should provide context for why the images are relevant. It should not duplicate the headline of the page or previous sections.
    • Use the headline style and headline alignment fields to change the look and feel of the headline if desired.
    • Headlines should be written in sentence case, not title case.
  5. Select "Add media" to upload or search from the media library to find the correct images.
    • Note that you can drag and drop the image order after they are added to the gallery.
  6. To format the images, select the Media format from the available options. For an overview of the image options, you can reference this documentation.
  7. Select blue "Add block" button.

    Screenshot of configure screen for the image gallery component
  8. Scroll to the top of Layout screen and select the blue Save Layout button.

Additional support