Imagery is a very powerful communications and marketing tool when used correctly on webpages. It is best practice to use an image component in the Layout tab or the Featured Image field in the Edit tab in most cases. However, if you need to embed a supplemental image within a Text Area component or the Body field of a page, the following instructions will show you how.

Steps to insert an image into a Text Area component or the Body field

  1. Start by finding the place you want to insert the image:
    • To add to the Body field, select the Edit tab.
    • To add to a Text Area component, select the Layout tab. Scroll to the Text Area component that you want to add the image to and select the pencil icon to configure it.
  2. In the WYSIWYG editor, place your cursor in the area where you want the image to appear.
  3. Select the Insert Media icon which shows a picture icon and a music note icon overlapping.
    • Tip: This is located between the Table icon and the Style dropdown in the WYSIWYG.

      Screenshot of the WYSIWYG editor
  4. Choose the image file you want to embed:
    • To add from your computer, select Choose Files button. Choose your image from your computer files and select Open. Write alternative text for the image. Then select the grey Save and insert button.
    • To select from the Media Library for this website, search by Name and select the checkmark in the upper left hand corner of the image. Then select the blue Insert selected button.
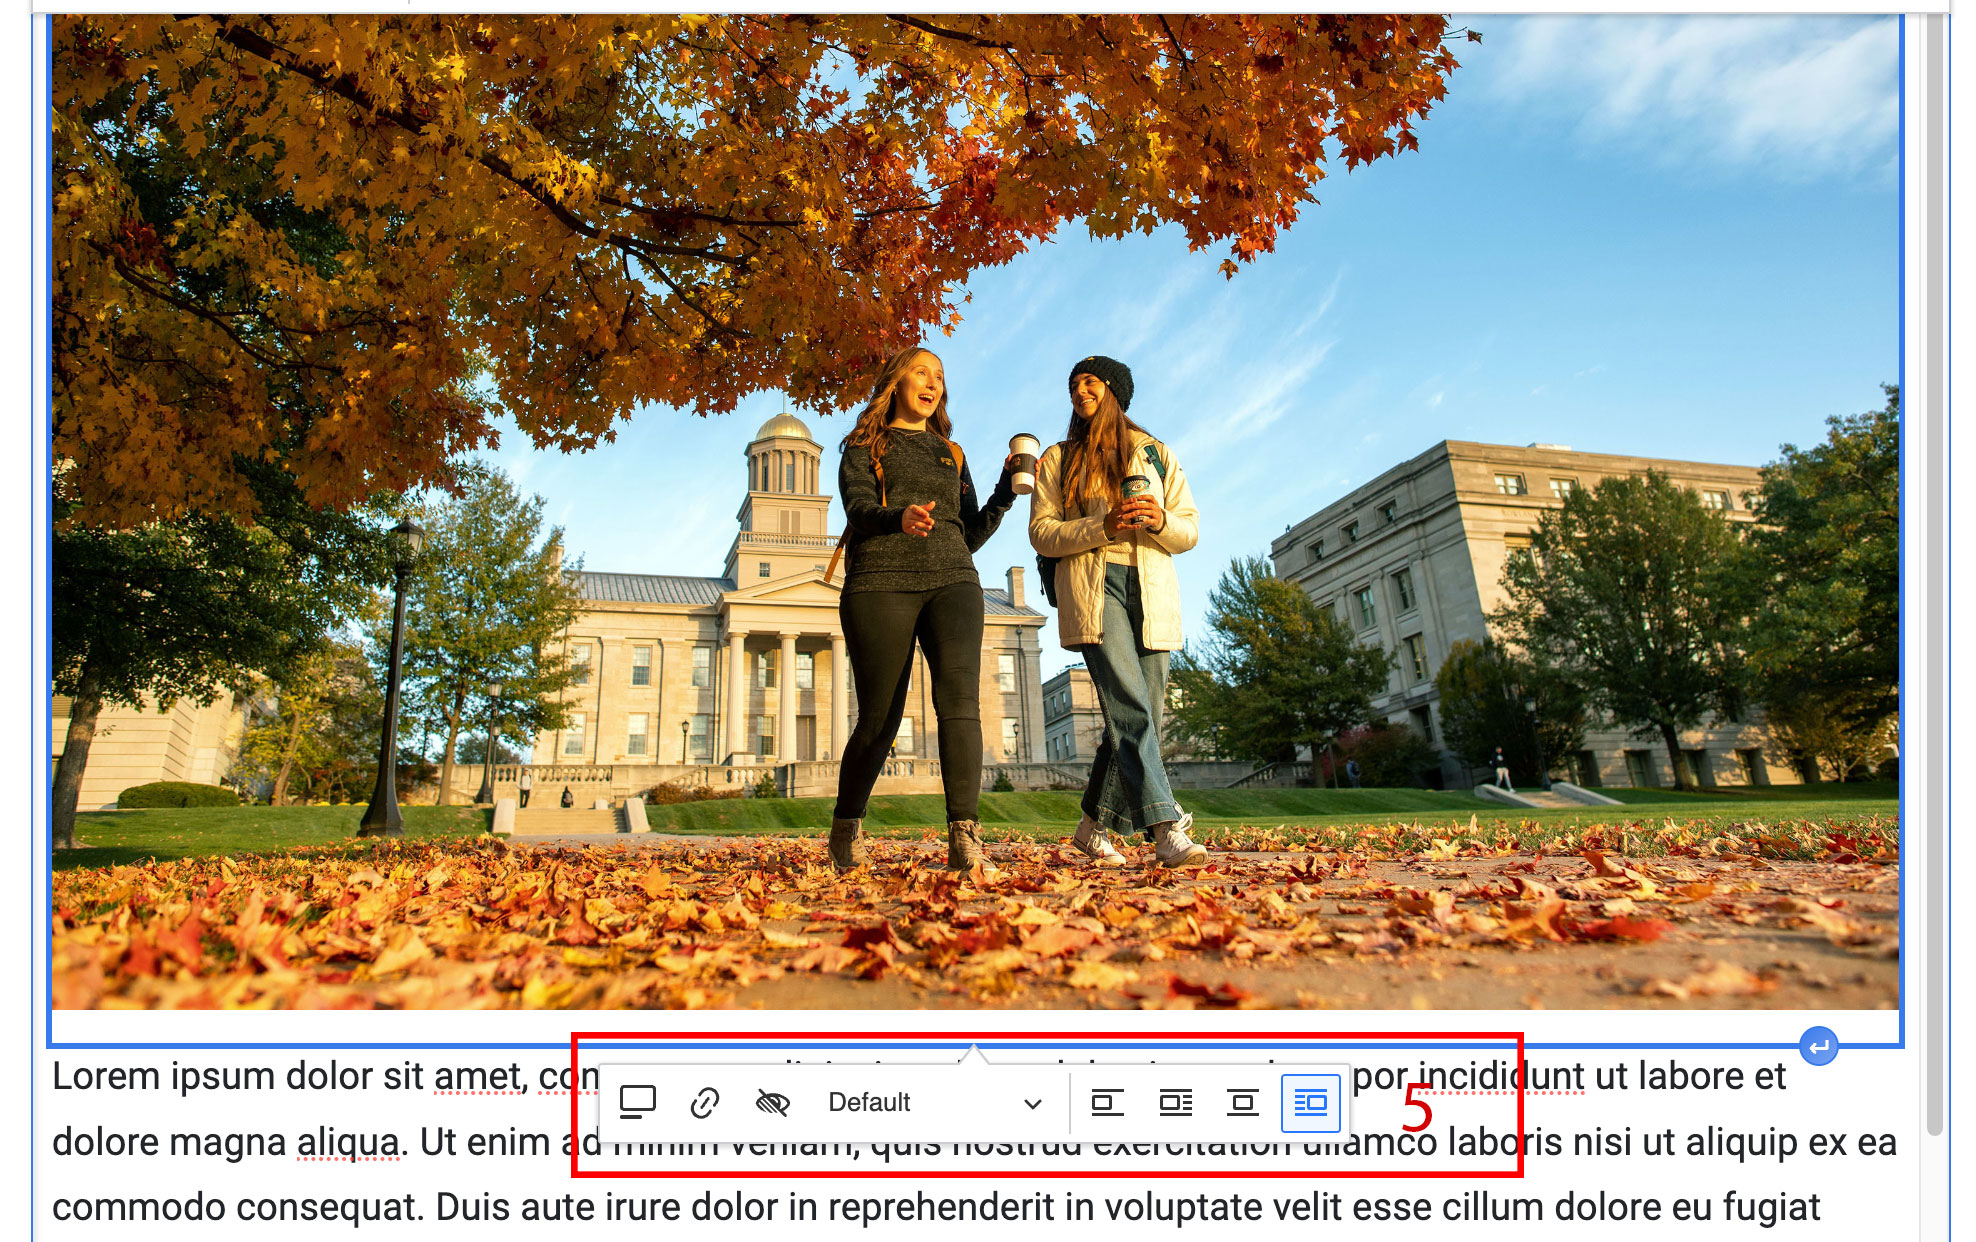
  5. To style the image, click on it and use the gray bar to do any of the following:
    • Add an image caption.
    • Link the image.
    • Write custom alternative text to override the existing alt text.
    • Choose the image size.
    • Align the image as desired.

      Screenshot of the image styling toolbar
  6. Once the image is styled as desired, save the page by:
    • If adding to the Body field, simply select the blue Save button.
    • If adding to a Text Area component, select either the blue Update button or blue Add block button. Then select the blue Save Layout button.

Additional support